
Hey there, sweet-toothed pals! Are you in the mood for something a little different this Halloween? I’ve got just the thing to make your holiday celebration a smash hit, my RIP Cupcakes! Now, before you roll your eyes and say, “Cupcakes for Halloween? How original,” let me assure you, these cupcakes are anything but ordinary. They’re a game-changer, a conversation starter, and most importantly, a taste bud pleaser!

So, what sets these cupcakes apart from the rest of the frosted crowd? Well, it’s all about the décor, darling! While most people go for the tried-and-true fondant or modeling chocolate to jazz up their cupcakes, I decided to take a detour and use something that’s not only delicious but also adds a delightful crunch, ladyfingers!
Ah, ladyfingers, the unsung heroes of the cookie world. Light, airy, and just the right amount of sweetness, they’re the backbone of many a dessert, from tiramisu to charlottes.
I always have a stash of them because, let’s be honest, I have a tiramisu addiction.
There’s something about the combination of coffee-soaked cookies and creamy mascarpone that’s just irresistible. But I digress.
The point is, I had a bunch of these cookies lying around, and I was itching to get creative with them.
So, there I was, rummaging through my pantry, trying to come up with a Halloween treat that would knock people’s socks off.
My eyes landed on the ladyfingers, and it was like the universe was sending me a sign.

Why You’ll Love This RIP Cupcakes Recipe
- Easy Ingredients: No need for a shopping spree; you probably already have everything you need!
- Transportable: These cupcakes are easy to carry, making them perfect for Halloween parties or spooky picnics.
- Kid-Friendly: Little ghouls and boys can join in on the fun of making and decorating these cupcakes.
- Crunch Factor: The ladyfingers add a unique crunch that you won’t find in your average cupcake.
- Instagrammable: These cupcakes are not just tasty; they’re photogenic too! Get ready for those likes to roll in.
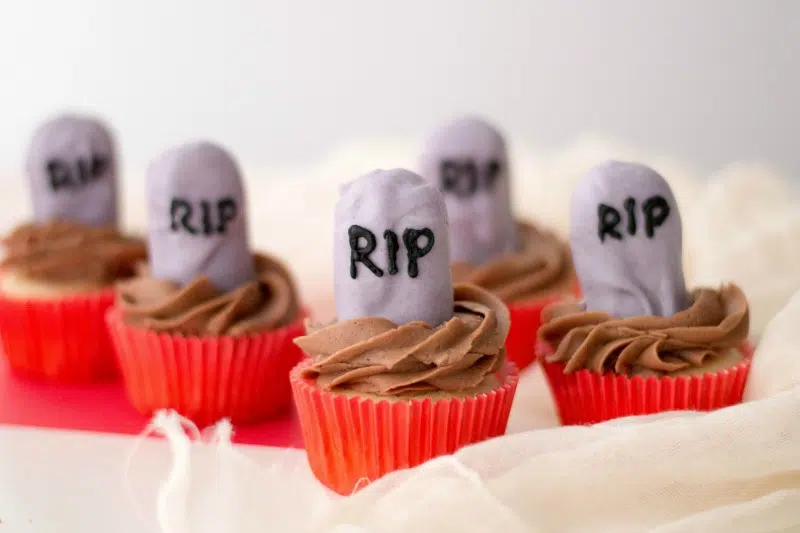
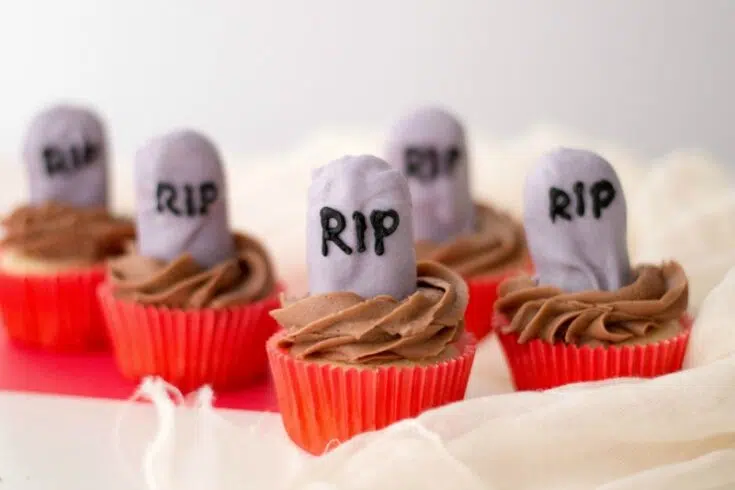
The rounded ends of the cookies looked like miniature tombstones, just waiting to be planted in a cupcake cemetery.
And that’s when it hit me, why not use ladyfingers as edible tombstones for my cupcakes? Genius, right?
Are you excited for Halloween? What are some of your Halloween Cupcakes to make for the spooky holiday?
You’ll find the specific ingredient amounts and detailed instructions in the printable recipe at the bottom of this post.
Ingredients For RIP Cupcakes

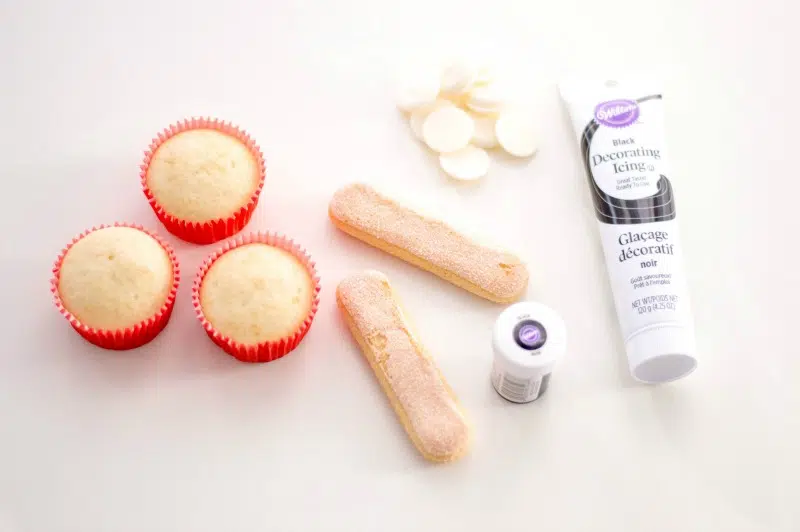
- vanilla cupcakes
- ladyfinger cookies
- white candy melts
- coconut oil
- black gel food coloring
- butter
- confectioner sugar
- cocoa
- milk
- Black decorating icing
Yields: one dozen decorated cupcakes
Directions For RIP Cupcakes
Allow your cupcakes to cool before decorating. Line a baking sheet with wax paper. Break your ladyfinger cookies in half.
Microwave your candy melt and coconut oil in 30-second intervals until completely melted. Add black gel food coloring and mix.

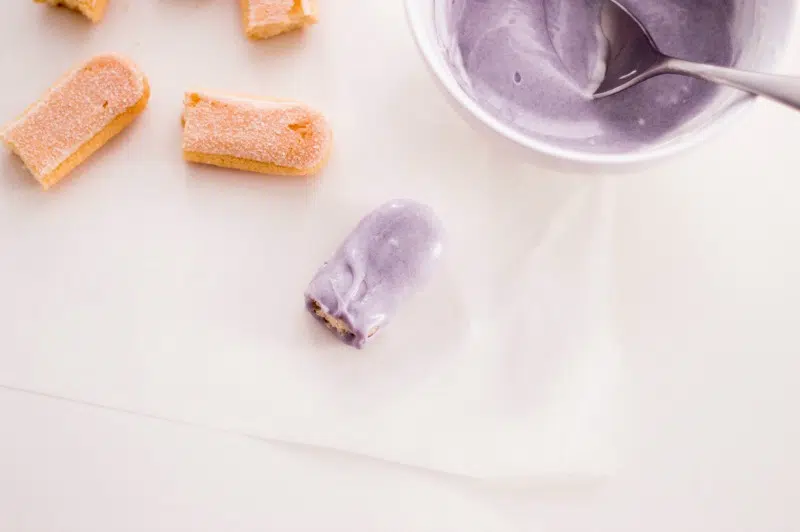
Completely submerge your ladyfinger cookies in the melted candy. Place gently on your wax paper.

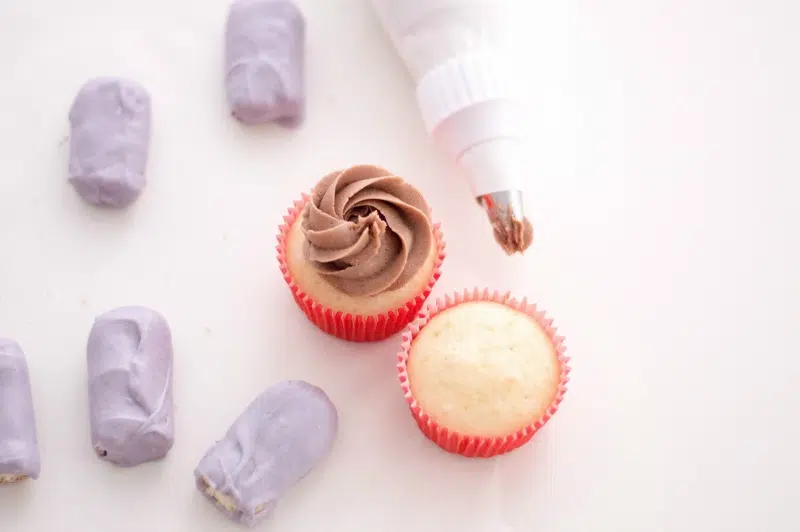
Make your buttercream by beating butter, sugar, cocoa, and milk on slow. Gradually increase the speed to high and allow the ingredients to blend thoroughly. Frost each cupcake with a frosting bag.
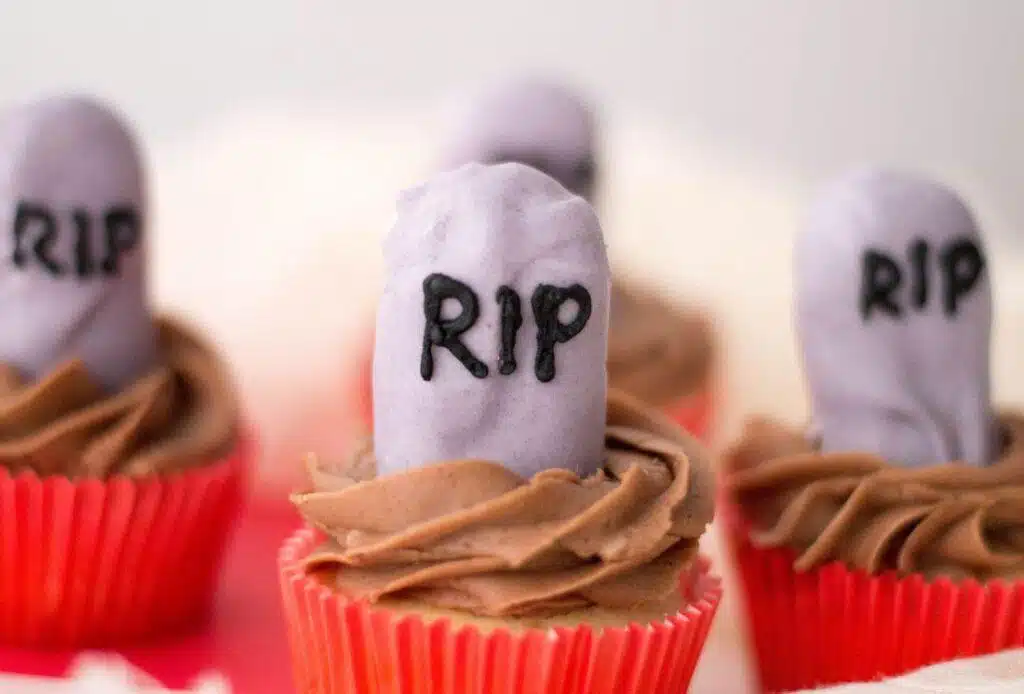
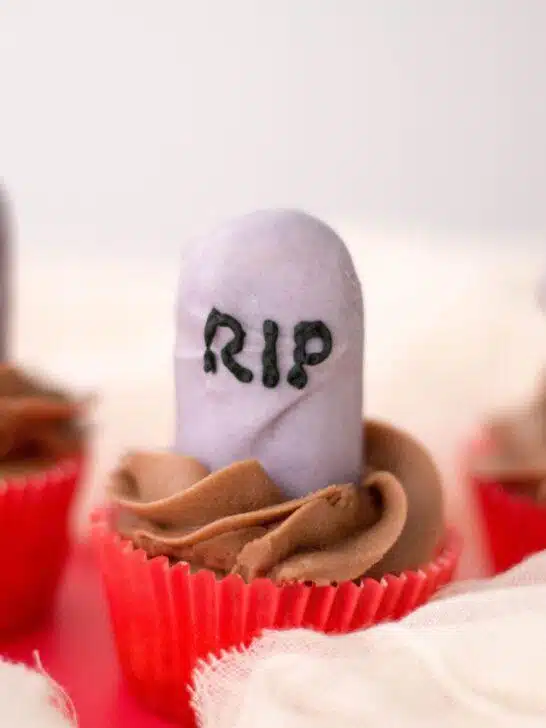
Once the candy has set on your ladyfingers, draw out “RIP” on each one with your black decorating icing.

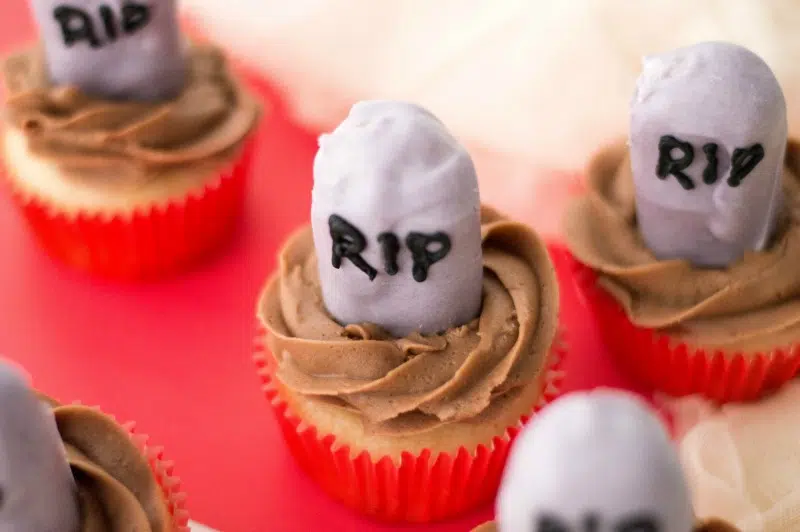
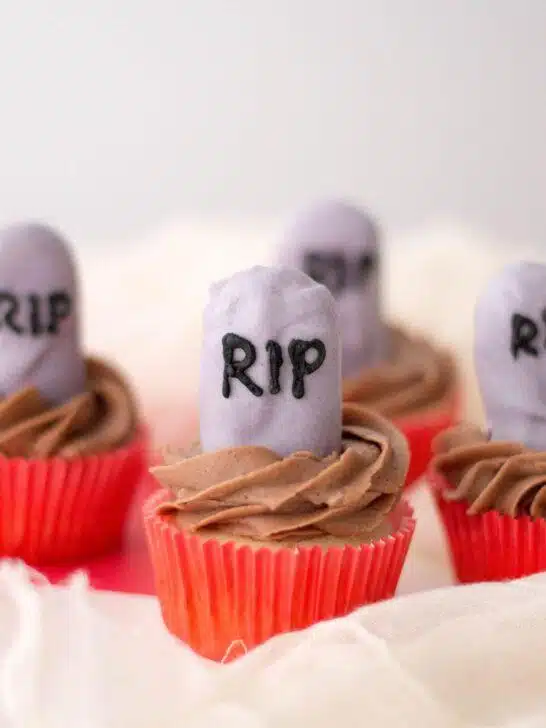
Place the tombstone cookies on each cupcake and Happy Halloween!
So, why should you make these cupcakes for your Halloween celebration?
Well, for starters, they’re a great conversation piece. I guarantee people will be talking about them long after the party is over.
Secondly, they’re a fun and easy project to do with kids. Let them write the “RIP” inscriptions or add some additional spooky decorations like gummy worms or candy corn.
And last but not least, they’re delicious. I mean, who can resist the combination of moist cupcakes, creamy frosting, and crunchy ladyfinger?
It’s a match made in Halloween heaven!
Alternative Ingredients to Consider
- Gingersnap Cookies: For a spicier tombstone.
- Oreo Cookies: Who doesn’t love Oreos? Use them for a different kind of crunch.
- Vegan Cream Cheese: For those looking for a dairy-free option.
- Pumpkin Spice: Add a teaspoon for a fall flavor kick.
- Edible Glitter: For that extra Halloween sparkle.

The Secret Sauce: Why Ladyfingers Make All the Difference
Okay, let’s dish! If you’re still on the fence about using ladyfingers in a cupcake recipe, let me tell you, it’s like discovering a secret garden in the middle of a forest.
Ladyfingers bring a unique texture that’s often missing in cupcakes. They’re like the crunchy croutons in a salad, the crispy bacon in a BLT, or the cherry on top of a sundae.
They complete the experience, making each bite a mini-adventure for your taste buds.
Trust me, once you try it, you’ll wonder why you never thought of it before!
Frequently Asked Questions
- Can I use a different type of cookie for the tombstones?
Absolutely, gingersnaps or Oreos work great too! - Is there a vegan option for the cream cheese frosting?
Yes, you can use vegan cream cheese as a substitute. - Can I make these cupcakes in advance?
Sure, they’ll keep for up to two days in an airtight container. - How do I store the cupcakes?
Store them in an airtight container to keep the crunch in the ladyfingers. - Can I freeze the cupcakes?
Yes, but it’s best to freeze them without the ladyfingers to maintain the crunch.

The Perfect Pair: Frosting Choices That Complement
Now, let’s talk frosting, the unsung hero that can make or break a cupcake. While I’m a die-hard fan of cream cheese frosting (because, let’s be honest, it’s the Beyoncé of frostings), you can totally switch it up.
How about a dark chocolate ganache for a more decadent touch?
Or maybe a marshmallow frosting to make it extra Halloween-y?
The sky’s the limit, and each frosting brings its own flair to the RIP Cupcakes.
The Spook Factor: Decorating Tips for the Ultimate Halloween Vibe
Alright, my creative souls, this is where you can let your imagination run wild. Sure, the ladyfingers are the stars of the show, but why not add some supporting actors?
Think gummy worms crawling out of the “soil,” or candy corn flowers for a pop of color.
You could even add some edible googly eyes to make it look like the cupcakes are watching you!
The point is, have fun with it. After all, Halloween is the one time of the year when more is more!

Ready, Set, Bake!
Before you dash off to haunt your kitchen, let’s make sure you’re all set. Got your ingredients? Check.
Preheated your oven? Check. Rolled up your sleeves and put on your witch’s hat? Double-check!
Now, go forth and bake the RIP Cupcakes that will make this Halloween unforgettable.
Don’t forget to print this recipe, pin it for later, and share your spooky successes (or hilarious mishaps) in the comments below. We’re dying to hear from you!
RIP Cupcakes Recipe
RIP Cupcakes
My RIP Cupcakes are unique because instead of using fondant or modeling chocolate, I used the ladyfingers to create the décor.
Ingredients
- 12 of your favorite vanilla cupcakes
- 6 lady finger cookies
- 1 cup white candy melts
- 1 tsp coconut oil
- ¼ tsp black gel food coloring
- 2 sticks butter, softened
- 4 cups confectioner sugar
- 2 tbsp cocoa
- 3-5 tbsp milk
- Black decorating icing
Instructions
- Make your favorite box of vanilla cupcakes
- Allow your cupcakes to cool before decorating. Line a baking sheet with wax paper.
- Break your lady finger cookies in half.
- Microwave your candy melt and coconut oil in 30-second intervals until completely melted.
- Add black gel food coloring and mix.
- Completely submerge your lady finger cookies in the melted candy.
- Place gently on your wax paper.
MAKING THE BUTTERCREAM
- Make your buttercream by beating butter, sugar, cocoa and milk on slow.
- Gradually increase speed to high and allow the ingredients to blend thoroughly.
- Frost each cupcake with a frosting bag.
- Once the candy has set on your lady fingers, draw out “RIP” on each one with your black decorating icing.
- Place the tombstone cookies on each cupcake and Happy Halloween!
Nutrition Information:
Yield:
12Serving Size:
1Amount Per Serving: Calories: 439Total Fat: 19gSaturated Fat: 11gTrans Fat: 1gUnsaturated Fat: 7gCholesterol: 59mgSodium: 178mgCarbohydrates: 67gFiber: 0gSugar: 53gProtein: 2g
Nutritional information is automatically calculated with ingredients and serving size and may not be accurate. Please always double check with your own nutritional apps as well.


About Kelly
Hey there, amazing souls! I’m Kelly, the heartbeat behind the cherished blog, “Kelly’s Thoughts On Things.” I started this digital journey in 2012 and quickly became your go-to Brand Ambassador for all things life-enhancing! I’m all about sharing savvy tips and heartfelt insights, especially when it comes to recipes, travel, health, crafts, and autism.